15 Slick Back Hairstyles for a Clean and Confident Look
Some days, your hair simply refuses to cooperate. Maybe you are short on time, dealing with flyaways, or tired of styling the same loose waves every morning. That is where slick back hairstyles can make getting ready feel much easier. They pull the hair away from your face, create a neat silhouette, and work with everything from casual outfits to evening looks.
These 15 slick back hairstyles for a clean and confident look include simple ponytails, polished buns, low styles, braided details, and looks that work across different hair lengths and textures. You do not need a complicated salon routine for most of them. A few basic tools, the right styling product, and a little patience can take you a long way.
The key is choosing a style that works with your natural texture instead of fighting it. Some looks suit straight hair beautifully, while others can work especially well with waves, curls, or coily textures. Below, you will find practical ways to recreate each style, plus tips for keeping your hair comfortable and your finish neat.
1. Classic Low Slick Back Ponytail
The classic low ponytail has a clean, understated feel that works almost anywhere. Hair is brushed smoothly away from the forehead and gathered at the nape, creating an open face and a long, simple silhouette. A glossy finish can make it feel polished for an evening outfit, while a softer finish works well for everyday wear.
Start by creating a center or slightly off center part. Apply a small amount of styling gel or smoothing cream through the roots, then use a fine tooth comb to guide the hair backward. Secure the ponytail with a snag free elastic and wrap a small section of hair around the base if you want to hide the band. Avoid using too much gel at once because it can make the roots stiff and flaky. A quality styling product usually costs around $10 to $30.
2. Sleek High Ponytail With a Lifted Crown
A high slick back ponytail gives the face a lifted, energetic appearance. The smooth roots contrast with the long ponytail, creating movement while keeping the overall hairstyle neat. It works especially well with a fitted outfit, blazer, simple dress, or casual jeans and a clean top.
Brush your hair toward the crown while keeping the sides smooth. Apply gel or edge control along the hairline, then secure everything with a strong elastic. For extra height, position the ponytail slightly behind the highest point of your head rather than directly on top. You can wrap a strand around the elastic to make the base look more finished. A common mistake is pulling the hair so tightly that the style becomes uncomfortable. You should have enough tension for a smooth finish without causing scalp discomfort. Expect to spend around $10 to $25 on styling products and accessories.
3. Low Slick Back Bun With a Center Part
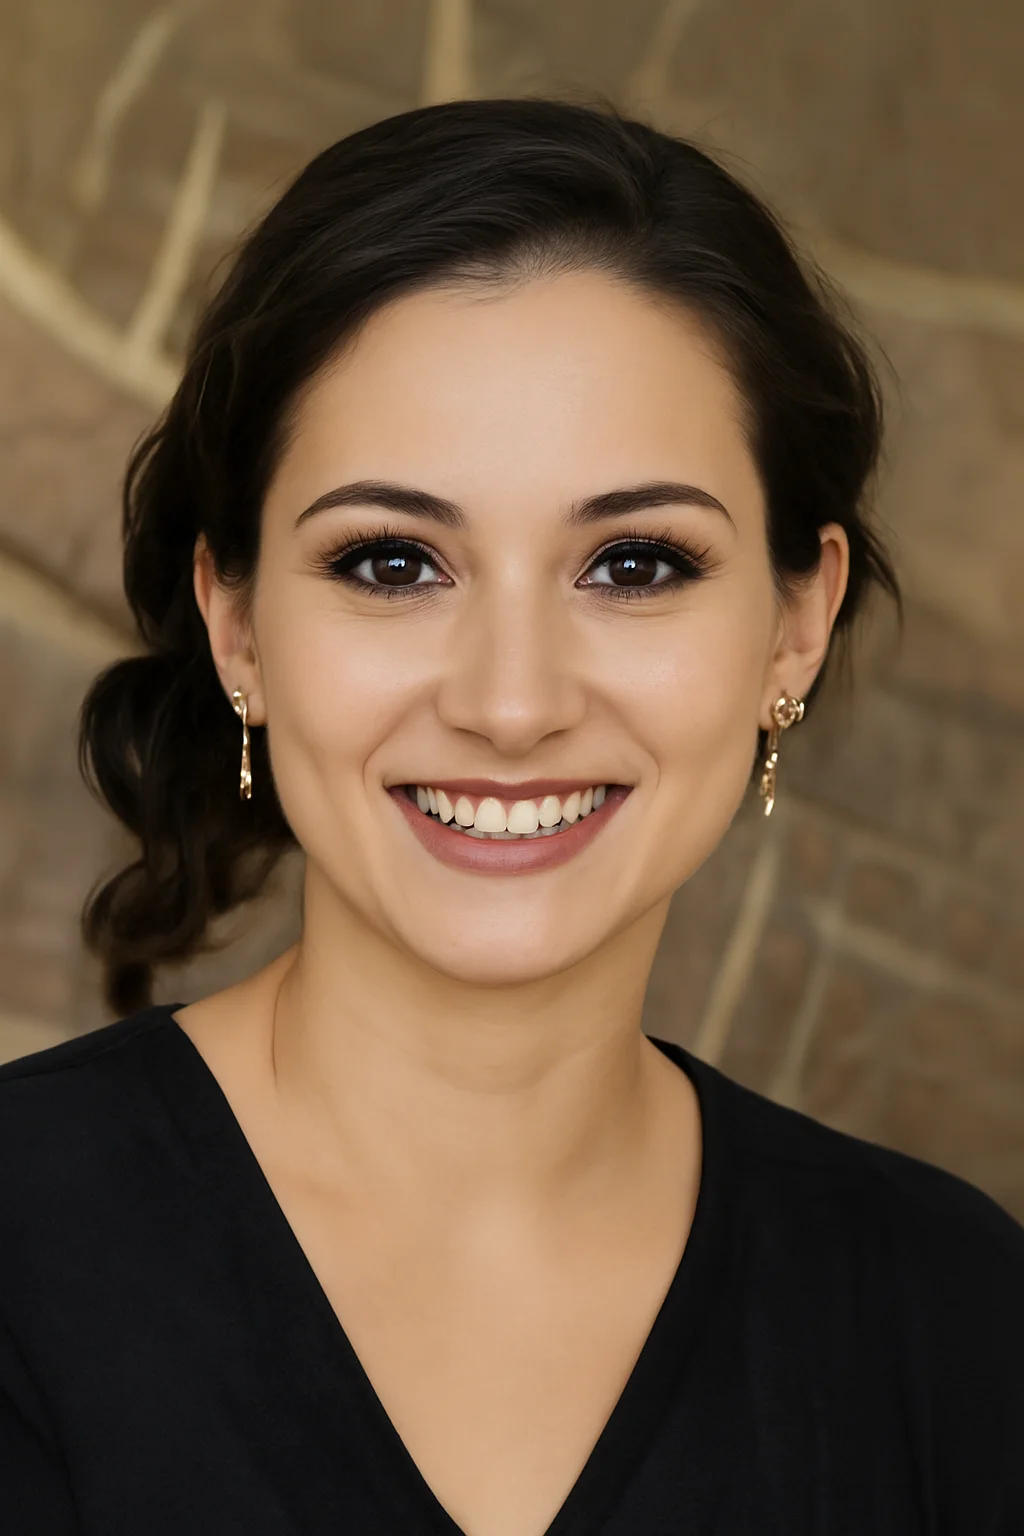
A low bun feels elegant without requiring elaborate styling. The center part gives it structure, while the smooth bun at the nape keeps the look understated. It works beautifully with earrings because the hair is completely away from the face and ears.
Create a clean center part and smooth the roots backward with a styling cream or light gel. Gather the hair into a low ponytail, twist it into a bun, and secure it with pins or a strong elastic. If your hair is shorter, use a small bun accessory to add shape. In my experience, the biggest mistake is making the bun too tight and perfectly round. A slightly relaxed shape often looks more natural. Products and pins can cost about $10 to $30, depending on what you already have.
4. Slick Back Hairstyle With a Deep Side Part
A deep side part gives a traditional slick back style a little more personality. The part creates an elegant diagonal line across the top of the head, while the rest of the hair stays smooth and controlled. It can look especially striking with a low ponytail or bun.
Use the arch of your eyebrow as a guide for finding a flattering side part. Apply a small amount of styling cream near the roots and comb the hair toward the back. Secure it into a low ponytail or bun. If you have baby hairs, smooth them gently with a small edge brush instead of repeatedly adding product. A lot of people skip this step, but it makes all the difference when you want the hairline to look neat without appearing overly coated. A comb, edge brush, and styling product may cost around $10 to $30.
5. Slicked Back Bun With Face Framing Pieces
If a completely pulled back style feels too severe, leave two very small pieces near the front of the face. The rest of the hair remains smooth and tucked into a low or medium bun, but the loose strands soften the look. This is a useful option when you want structure without losing a little movement.
Start with a center or soft side part and smooth the majority of the hair backward. Leave two narrow sections near the temples before creating the bun. Curl those pieces slightly with a small iron if desired, or let them remain natural. Keep the strands thin so the style does not lose its clean appearance. Avoid pulling out too much hair because it can make the bun look unfinished. The styling products and pins should cost around $10 to $30.
6. Glossy Slick Back Ponytail
For a more noticeable finish, try a glossy ponytail. The roots are brushed completely smooth while the length has a controlled shine that catches the light. This style looks particularly polished with evening clothing, a simple black dress, or a tailored blazer.
Apply a small amount of smoothing serum to the lengths first, then work a lightweight gel through the roots. Brush the hair into a ponytail and secure it tightly enough to hold but not enough to create scalp discomfort. Finish with a tiny amount of serum over the surface. Be careful with heavy oils because too much can make the hair look greasy rather than glossy. A lightweight serum and styling gel can cost about $15 to $40 together.
7. Slick Back Bubble Ponytail
A bubble ponytail adds playful shape to an otherwise simple slick back style. The top remains smooth and controlled while the ponytail is divided into several sections, creating rounded bubbles along the length. It works well for casual outings, parties, and fashion focused looks.
Begin with a smooth high or medium ponytail. Add small elastics down the length every few inches, depending on how long your hair is. Gently pull the hair between each elastic to create rounded sections. Keep the spacing fairly even so the hairstyle looks intentional. Clear or color matched elastics work best. In my experience, the biggest mistake is making each bubble too large, which can make the ponytail look bulky. A pack of small elastics usually costs only $5 to $10.
8. Slick Back Braided Ponytail
A braid adds texture and structure to a smooth ponytail. The roots remain sleek while the length is gathered into a traditional three strand braid. The contrast makes the hairstyle feel more detailed without requiring complicated techniques.
Smooth your hair into a low or high ponytail first, then divide the length into three equal sections and braid tightly. Secure the end with a small elastic. You can keep the braid compact for a polished appearance or gently loosen the outer edges for a softer finish. If your hair is layered, a little styling cream can help keep shorter pieces contained. Avoid brushing too aggressively over the braid because that can create unnecessary breakage. Expect to spend around $10 to $25 on styling products and elastics.
9. Slick Back Half Up Style
A half up slick back style lets you keep some length around the shoulders while creating a smooth shape around the face. The top section is pulled backward, leaving the lower portion loose. It works especially well for medium to long hair and can be adapted for straight, wavy, or lightly curled textures.
Separate the top section from temple to temple and brush it backward. Secure it at the crown or slightly below with a small elastic or clip. Apply a little gel around the roots for a cleaner finish. Leave the lower section natural or smooth it with a flat iron. A common mistake is taking too much hair into the upper section, which can make the style look more like a full ponytail. Start with less and add more if needed. Styling products and a quality clip can cost around $10 to $30.
10. Slick Back Low Ponytail With a Wrapped Base
A wrapped ponytail has a small detail that makes a simple hairstyle look more finished. The hair is pulled into a low ponytail, then a strand from the length is wrapped around the elastic so the band disappears. The result is understated and polished.
Create a clean center part and smooth the hair toward the nape using a light styling cream. Secure the ponytail, then take a small section from underneath and wrap it around the elastic. Secure the end with a bobby pin tucked underneath. If your hair is very fine, use a small clear elastic before adding the wrapped section. I always recommend choosing a strand that is not too thick because a bulky wrap can become difficult to secure. A styling cream, elastics, and pins should cost around $10 to $25.
11. Slick Back Style With a Minimal Hair Clip
If you prefer accessories over visible elastics, use a simple claw clip or polished barrette. The hair is smoothed backward and secured at the back of the head, creating a clean shape while keeping the style easy to remove.
Brush the hair backward and twist it gently before securing it with a strong clip. Choose a clip large enough to hold your hair without pulling. For fine hair, a smaller clip may provide better control. Keep the accessory simple in black, tortoiseshell, brown, or metallic finishes. Avoid using a clip that is too small because it can slide out during the day. A good hair clip usually costs around $8 to $25. What I personally love about this option is that you can take the clip out later and let the hair fall naturally.
12. Slick Back Hairstyle for Curly Texture
Slick back styling does not mean you need to straighten naturally curly hair. A smooth bun or ponytail can showcase your natural curl pattern in the length while keeping the front and sides controlled. The contrast creates a beautiful mix of neat structure and natural texture.
Apply a leave in conditioner or curl friendly styling product first. Use a soft brush or your fingers to guide the roots backward, then add a small amount of gel for hold. Gather the hair into a low ponytail or bun while allowing the natural curls to remain visible through the length. Avoid brushing dry curls aggressively because this can create unnecessary frizz. A curl cream and gel may cost around $15 to $40. Choose products that give hold without leaving the hair feeling brittle.
13. Slick Back Style With Baby Hair Detail
Baby hairs can become part of the hairstyle instead of something you need to completely hide. A sleek bun or ponytail paired with softly shaped edges can add personality and detail around the forehead. The result can feel polished while still showing your natural hairline.
Start by smoothing the main body of the hair into a ponytail or bun. Use a small edge brush and a tiny amount of edge control to shape the baby hairs. Try a soft curve rather than creating several dramatic patterns if you want an everyday look. A common mistake is applying too much edge product, which can leave a visible buildup. Start with a very small amount and add more only where necessary. Edge control and a small brush typically cost around $8 to $20.
14. Slick Back Top Knot
A high top knot creates a clean, lifted silhouette while keeping the neck and face open. It works especially well when you want a hairstyle that feels fresh and practical on warm days. The style can look sleek for a night out or slightly softer for casual wear.
Brush the hair toward the crown and secure it into a high ponytail first. Twist the length around the base and secure it with pins. Smooth the sides with gel or styling cream, then finish with a light mist of hairspray if needed. Leave a small amount of natural texture in the bun instead of forcing every strand into place. In my experience, a slightly imperfect top knot often looks more flattering and comfortable than a tightly constructed one. Products and pins can cost around $10 to $30.
15. Slick Back Low Bun With a Middle Part and Earrings
For a refined finishing touch, pair a center parted low bun with noticeable earrings. Because the hair stays completely away from the face and neck, earrings become an easy way to add personality. Pearl drops, gold hoops, sculptural earrings, or simple gemstones can all work.
Create a precise center part and smooth both sides toward the nape. Secure the hair into a low ponytail, twist it into a bun, and pin it in place. Add your earrings only after the hairstyle is finished so you can see how they balance the face. Avoid choosing earrings that are so heavy they pull on the ears throughout the day. A quality pair can range from $15 to $60, while basic styling products may cost another $10 to $25.
How to Make a Slick Back Hairstyle Last
The secret to a long lasting slick back style is preparation rather than simply adding more gel. Start with hair that is detangled and reasonably smooth. If your hair is dry, apply a lightweight leave in conditioner or smoothing product before adding stronger hold.
Work in small sections when smoothing the roots. This helps you control flyaways without coating the entire head in product. A fine tooth comb can create a very smooth finish, while a soft brush gives a slightly softer result.
Once the hair is secured, use a small amount of gel or edge product only where needed. If you apply too much at the beginning, the style can become heavy and difficult to reshape.
For special occasions, carry a few bobby pins, a small comb, and a travel size styling product. These take up almost no space and can quickly fix loose strands.
Choosing the Right Slick Back Style for Your Hair
The best slick back hairstyle depends on your length, texture, and how much hold you need.
Straight hair often works well with sleek ponytails and low buns because the surface can become smooth with relatively little product. Wavy hair can look beautiful when the roots are slicked while the natural texture remains through the length.
Curly and coily hair can also work beautifully with slick back styles. Rather than trying to remove all natural texture, focus on controlling the roots and preserving the curl pattern in the ponytail or bun.
Shorter hair may work better with clips, mini buns, or half up styles. If you have layers, use a little extra product around shorter pieces rather than applying heavy gel everywhere.
How to Avoid a Slick Back Hairstyle Looking Too Harsh
A slick back style can look softer when you add small details. Try a center part instead of pulling everything straight backward, or leave two fine face framing pieces around the temples.
Your finish also matters. A high shine wet look feels more dramatic, while a soft matte finish feels more casual and natural.
Accessories can change the mood too. Small hoops create an everyday appearance, while pearls or sculptural earrings make a low bun feel more suitable for an event.
Most importantly, do not pull your hair tighter than necessary. A smooth hairstyle should still feel comfortable. If your scalp feels sore, loosen the style and try again with less tension.
Conclusion
Slick back hairstyles are useful because they can make a simple outfit feel more finished without requiring a complicated styling routine. Whether you choose a low ponytail, polished bun, high ponytail, braided style, or top knot, the basic idea stays the same: control the roots, choose the right amount of hold, and let the hairstyle work with your natural texture.
These 15 slick back hairstyles for a clean and confident look give you options for casual mornings, workdays, dinners, parties, and special events. Some are extremely simple, while others add details such as wrapped ponytail bases, braids, bubbles, hair clips, or styled edges.
You also do not need a drawer full of products. A good comb, a comfortable brush, one reliable styling product, a few elastics, and some bobby pins can cover most of these looks.
Start with one style that matches your hair length and texture. Practice it on a normal day before wearing it somewhere important. Once you know how your hair responds to the products and tension, getting the finish you want becomes much easier.
A clean hairstyle does not have to mean completely changing your natural hair. Small details can create a polished result while still letting your own texture show.
Which of these slick back hairstyles would you try first? I’d love to hear which one fits your everyday style.
Frequently Asked Questions
How do you make a slick back hairstyle stay in place?
Start with properly detangled hair and work in small sections. Use a styling cream or gel at the roots, then smooth the hair with a fine tooth comb or soft brush before securing it. Finish with a light layer of hairspray if you need additional hold.
What products are good for slick back hairstyles?
A lightweight styling gel, smoothing cream, edge control, or strong hold pomade can work well. The best choice depends on your hair texture and the finish you want. Start with a small amount because adding too much product can cause buildup or make the hair feel stiff.
Can you do slick back hairstyles with curly hair?
Yes. Slick back styles can look beautiful with curly and coily textures. You can smooth the roots while leaving the natural curls visible in a ponytail or bun. Use curl friendly products and avoid aggressively brushing dry curls.
Are slick back hairstyles damaging to hair?
The hairstyle itself does not automatically cause damage, but repeated tight pulling can put stress on the hairline and scalp. Avoid excessive tension and give your hair breaks between tightly secured styles. Use gentle elastics and remove them carefully rather than pulling them out.
How can I make a slick back hairstyle look softer?
Try a center or side part, leave a couple of fine face framing pieces, or choose a low bun instead of a very tight high ponytail. A soft shine rather than a wet finish can also make the hairstyle feel more natural. Simple earrings can add detail without making the style look severe.